https://lizscreativecorner.blogspot.com/http://lizscreativecorner.blogspot.com.au/p/my-canvases-and-altered-art.htmlhttp://lizscreativecorner.blogspot.com.au/p/my-tutorials.htmlhttp://lizscreativecorner.blogspot.com.au/p/challenges_24.html

Pages

My Lovely Friends,

Tuesday 24 February 2015

Card for paper Take Weekly challenge and mini Tutorial

Hi guys, phew these weeks go fast don't they, anyway it's time again for the latest challenge over at 

paper Take Weekly
which is Take your pick,

Choose sketch 98 or free for all,
cool colours from the colour wheel
Technique- Masking - make a scene using 2 or more images
Use Kraft card,
go to the challenge site for more details,

I've used all of them,

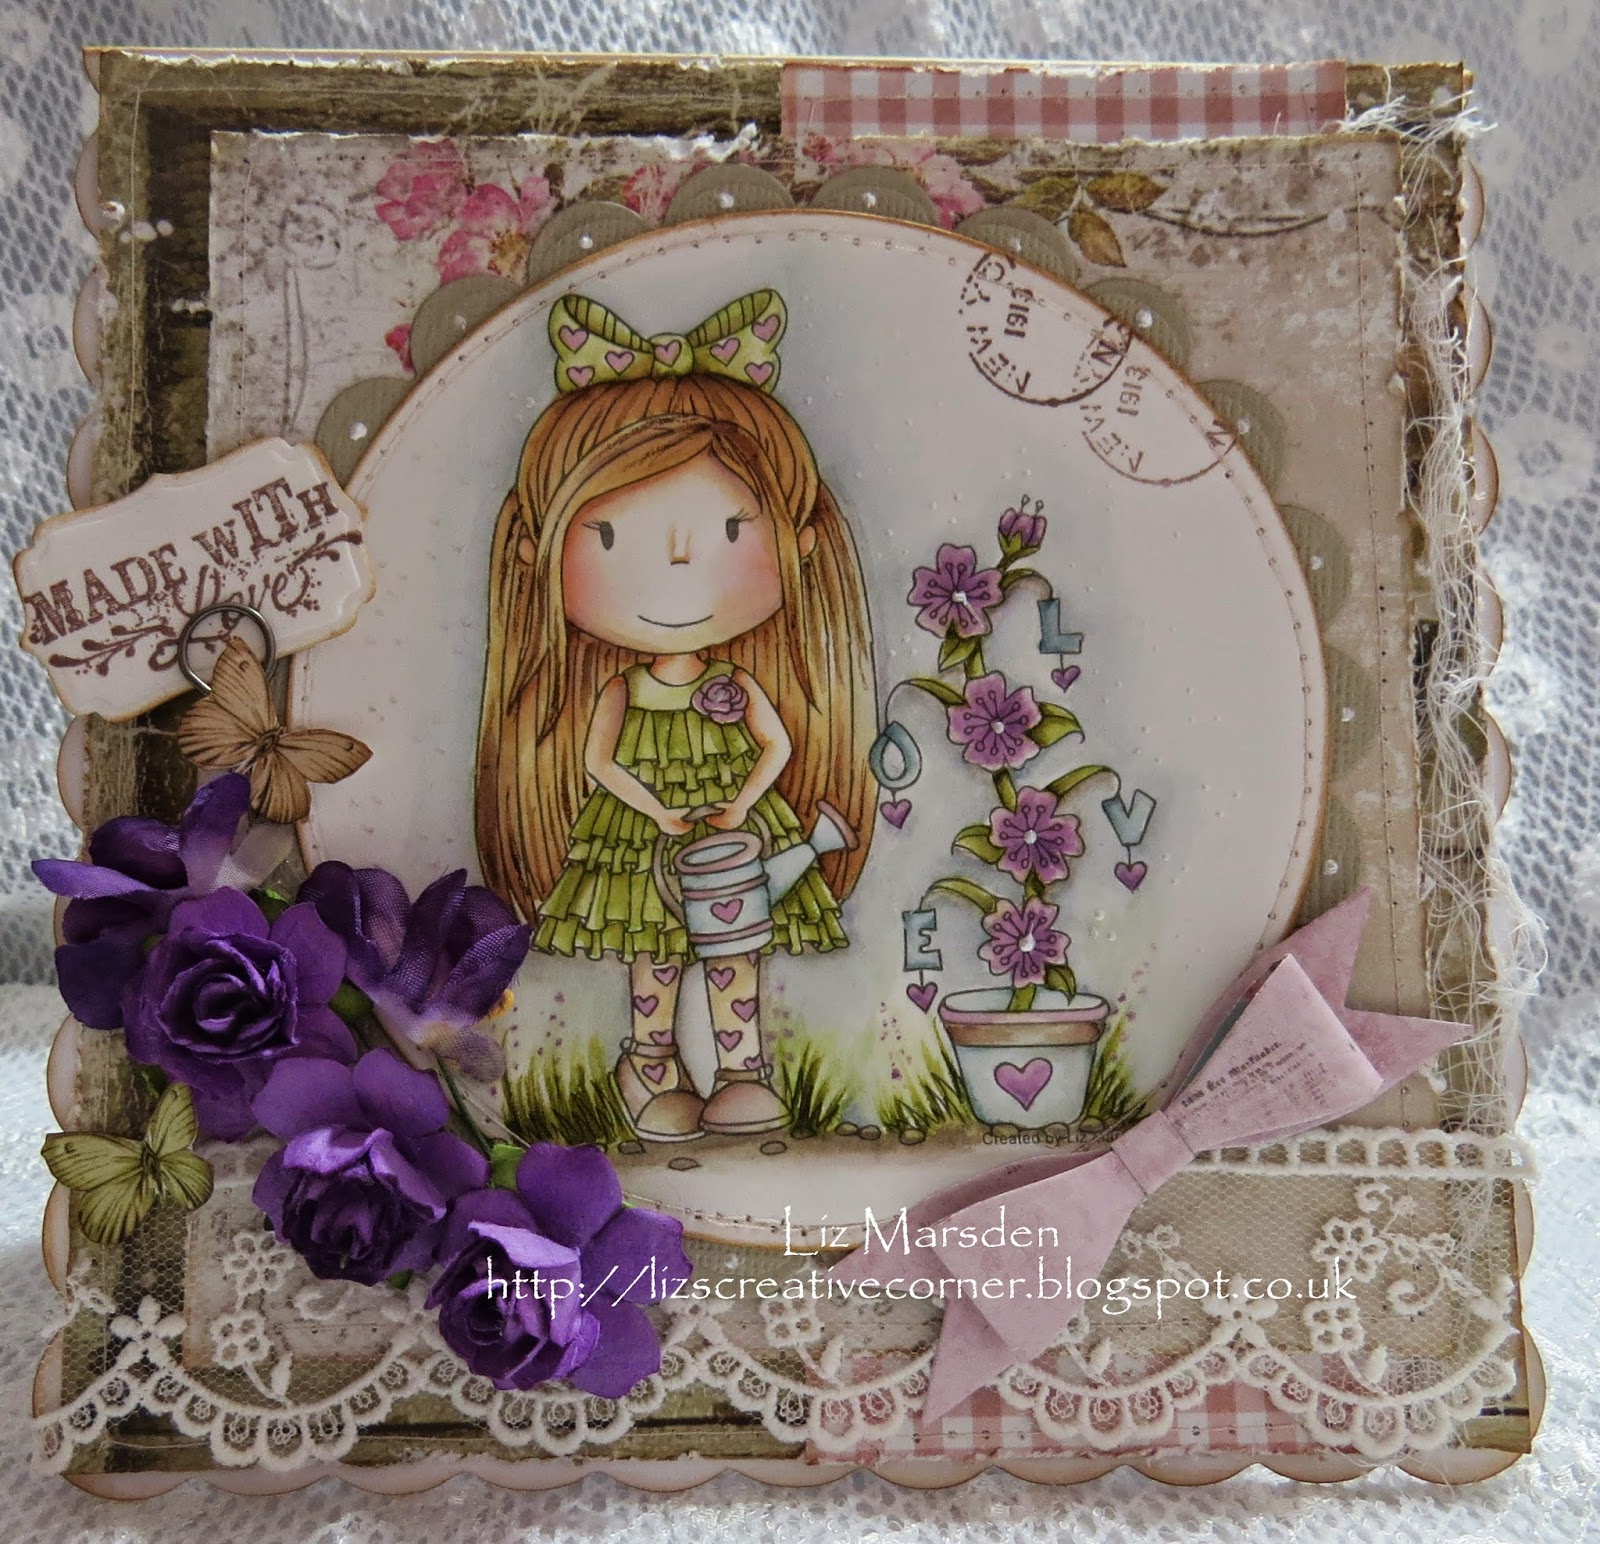
I've masked Tilda goes shopping with Boutique shop window,( I've done a little tutorial of this technique which is below), I coloured the images with my copics and cut out the shape using a Go Kreate die,
The gorgeous flower is from The Ribbon Girl, the flourishes are from Cheery Lynn again, love this flourish!!!!

Masking Tutorial shown for this card,

Take your chosen stamps, and stamp the one to be in the foreground first onto your chosen card stock, make sure you leave plenty of room for the background stamp,

Next make a mask of the foreground stamp, ie Tilda goes shopping, I used 2 post it notes, layered together as my image was larger than one piece, you then stamp on your image and cut around the outline, here I left the right hand side on it, as i wanted the mask to stick down better and because the background stamp wasn't going near there, you can of course cut all the way round and is what you usually do if your not being lazy like I was lol,
Place your mask carefully over your stamped image, so none of the bottom stamp shows, as shown.


Take your background stamp and a stamping system for masking, ink your stamp and  place your stamp onto your stamping block and then take this to the stamping system,mine consists of 2 acrylic pieces,  one is a upside down L shape and a oblong acrylic piece  which you fit together in the angle shown, ( top Left) then take your background stamp and fit it into the angled corner too, as shown, hopefully you can just make out the larger acrylic piece underneath, that my stamp block is stamping onto,
 lift your stamped image up and you should then have a light image on your masking system acrylic block,
This picture is the background image on the masking system so you can place it over your masked image, to place it  where you want it to be, ie, left, right, up down etc, I made most of the Boutique letters visible and the window higher then Tilda's feet to look like it's in a building as she's walking past, when you have this where you want it, carefully lift the larger piece of the masking system off your masked image making sure you don't move the upside down L shaped piece, as this is your guide for your stamp background, if you do move it just go back and align it all up again,

PS: sorry I've just noticed the bits of old stamping on my masking system at the bottom of the picture, I once used a permanent ink for another project and it won't come off, so just ignore that bit 


Take your inked up stamp on your stamp block and making sure it fits into the angled corner of your upside down L shaped masking system, stamp your background image over your masked image, as shown above,

This is what it will look like after you have removed the background stamp, parts of the stamp will be on the mask, this is what it should be so don't worry!!! at this point remove your Tilda mask, you can reuse this later some time or throw it away,

This is the finished look, I hope this has made sense as it's a little hard to explain, if you want to ask any questions, just ask away,


Papers Maja Design,
Kraft cardstock
Doo Hickey border die
Cheery Lynn flourish die
TRG - flower - Mixed Dahlia Barley sugar
Tim Holtz Idea-ology chit chat stickers
copics
Skin - E000, 00, 11, 13, R11
Hair - E44, 43, 42, 41, 40
Top - E55, 53, 51, 50
Jeans - E77, 74, 71, 70
Shoes - W5, 3, 1, 0
Bags / blue - B97, 95, 93, 91
Green - G21, BG93
Window frame - W5, 3, 1, 0,
Bricks - W3, 1, 0, - E43, 41
Glass - C3, 1, 0

Challenges
Simply Magnolia - CAS or fully loaded
Dies R Us - flourishes
Bunny Zoe's - for the girls
Cheery Lynn - Anything goes

Happy Crafting!!!
Hugs Liz xx


Tuesday 17 February 2015

Bingo

Hi guys it's time for Bingo over at 
Paper Take Weekly so eyes down, lol
We are being sponsored again by the lovely Ribbon Girls, thank you Mary and Andrea xx

Here's my take on it and I used the middle row down,
Gems/ Free - Chipboard/ Lace


I made another of the Tissue paper roses again, so love the soft look of these, the papers are again by Maja Design, 
I cut some leaves out of brown DP and embossed them to add detail then added distress ink on the edges too,
The fabby chip board is by Dusty Attic and is a Marrakesh design, i added some pearls on the middles of the design,
The gorgeous flourish is by Cheery lynn,
Key charm and flower from my stash as is the pearl string,
A hint of cheesecloth finishes it off too,

Challenges
ABC Challenge - D is for die cuts

Hope you'll join us in the fun!!!
Happy Crafting!!!
Hugs Liz xx

Sunday 15 February 2015

Lullaby Lullaby,

Hi guys, this is my second post this morning, this time for 
Magnolia Forever which is 
Baby
and we are being sponsored by Scrapy Flowers,


As you can see I've made another cradle again from the awesome template by
The papers are again by one of my favourites  Maja design, all have been distressed on the edges with ink and the sides are machine sewn,
The most precious chip board sentiment is from Scrap and Craft again, this I painted with gesso then when wet I added a coating of glitter,

Sleeping baby Tilda is coloured with my distress re-inkers and then fussy cut out, 
I added some pink tulle at the top and base of the cot which I tied into large bows, the flowers are  from Sweet Lilac,

I used a teddy type ribbon from my stash, again I've had it for years and just cut one off, for on the Base,
the heart hanger is from Live and Love crafts,

I used a ruffled type ribbon for on the top of the cradle and sewed a dangle type embellishment at the end,
the beautiful lace and ruffle ribbon were also from Live and love crafts,

Full view again, and yes this rocks too lol,

This is my second post this morning, please scroll down for my
Sweet lilac post,
Challenges
Magnolia-licious - Hearts and flowers
Deep Ocean -Love is all around
Midweek Magnolia's - Pretty in Pink
Live and love crafts - Hearts
Scrap and craft - love/ romance/ valentines

Happy Crafting!!!

Hugs Liz xx

Love is in the Air

Hi guys, it's time for another challenge over at Sweet Lilac,
This time it's 
Love is in the Air
This is my take on it,


I took a plain MDF frame and added a layer of gesso over it, when dry I used a few different stencils to add some texture using grunge paste,

Let this dry then take  a couple of colour bloom sprays and  I lightly sprayed some layers down, using some kitchen roll to dab in between to add to the colour displayed too,

The gorgeous flowers are all of course from Sweet Lilac and I just layered them up using 3D glue and added a few gems here and there too,

The flourish is by Cheery Lynn,
The sentiment is stamped with versa mark then added embossing powder over the top, 

Hope you'lll join us in the fun and show us what you will make with your Sweet Lilac flowers too, remember the winner receives a box of the gorgeous flowers,
Lemon classic roses
Yellow open roses
Light blue open roses

La La La Land crafts - Beautiful day sentiment
Glass beads - Magnolia
Cheery Lynn flourish

Crafters Workshop - stencils
Art is
Gothic Romance
Bird Cages

Grunge paste

Colour bloom sprays-
Gold foil
Soft Teal

Challenges,
That's crafty - Be my Valentine
Dies R Us - flourishes
Fussy and Fancy - it's all about love


Happy Crafting!!
Hugs Liz xx

Tuesday 10 February 2015

The cradle will rock

Hi guys, it's time for our new challenge over at 
this time it's hearts and flowers,
we are being sponsored by The Hobby House, thank you Jill,

Now i know that is usually love and romance but I thought out the box and made a babies cradle!!! I know your your thinking what!!!!!!!!!!!!! 
well here it is lol

Sweet lilac Flowers on the crib ends and a heart near the chipboard sentiment from scrap and craft,
The fabulous template came from Sandra's scrap shop and I love it, in fact I've also made another which you will see another day lol,

The papers are from Maja Design, the gorgeous lace over the crib top is from The Ribbon Girl and is 45mm Jessica white Guipure Lace,

See another couple of hearts on each teddy bear!! these I've had in my stash years but so wish I knew where to get more, also another flower on the inside too,

I used some more of the outer lace as a top for the blanket he's lying on,
 Then used some of the 13mm white droplet lace again from The Ribbon Girl as a trim around the outer side of his blanket,

Sleeping baby Tilda, who once again has become a baby Edwin is coloured with my distress re-inkers and fussy cut out, I attached a layer of folded over acetate to the back of him and made a slit in the blanket paper to slide the acetate under so it hides the base of it,
The bottom end/base has a bow on again which I've had in my stash years and it's all fixed together with a ivory pearl brad from TRG and yes the cradle does rock!!!!!!!!!! he he,

Sorry for so many pictures it's hard to take or get the detail in one one or two, oh and can you see the smaller flowers on the bar underneath too?

Challenges
Crafty calendar - Anything goes
LHOSM - Love or hearts
Tilda's Town - Fussy and fancy or clean and layered
Stamp and create with Magnolia - Hearts
Scrap and craft - Valentines day/ Love/ Romance

Happy Crafting!!!
Hugs Liz xx

Friday 6 February 2015

Love Grows

Hi guys, i'm back today with another gorgeous digi image from the lovely Christine of
Christine asked me if I wanted to GDT  here for a few months for her and I of course jumped at the chance, thank you hun, xx

I've used Love Grows Ellie and she's coloured with my distress re-inkers with a little liquid pearls dotted around too, from The Ribbon Girl,
the postage stamps are by Magnolia,

The purple roses are from Sweet lilac and the others are again by Magnolia,
The gorgeous papers are from Lemon craft house - house of roses from Scrap and craft and the beautiful lace is Clementine ivory embroidered Tulle Lace from The Ribbon Girl, as is the memo pin holding the made with love sign, made with a Stempleglede stamp,
The bow die is a Cheery Lynn one I think!!,

Challenges
Aurora wings - Valentines
A gem of a challenge - Lots of layers
Scrap and craft - Valentines /love/ Romance

Happy Crafting!!
Hugs Liz xx

Tuesday 3 February 2015

Toot Toot

Hi guys, back today with my card for Paper Take Weekly,
this time it's anything goes - optional use newsprint or pages from an old book,
sponsor  Lili of the valley

As you can see i sort of used newsprint lol, the papers are by maja Design and the fab image is by Lili of the valley called Toot Toot, coloured with my distress re-inkers and I've used liquid applique too,
the tag is a spellbinders die,
twine from The Ribbon Girl, charm and buttons stash,


I also used Glossy accents on the windscreen and head lamps,

will look for any challenges later,
happy Crafting!!!
Hugs Liz xx

Sunday 1 February 2015

Tilda's love notes

Hi guys, it's been snowing as I write this and sooo chilly too, still Tegan has been saying she wants to build an Olaf or what ever it's called, I should know really as I have to watch Frozen enough!!!!

I'm so excited to be putting this on my blog today with my first DT card as A Ribbon Girl yeah!!!!
I'm also combining my card with the fabulous other DT I'm on
Magnolia Forever, whoo hoo!!!

The Ribbon Girl theme is Card only - Romance
The prize is  a £10 pound LOTV voucher
and a £10 pound TRG Voucher

Magnolia Forever is - Love is in the Air

I've made a book style card using Tilda with Dot Bow coloured with my copics and Glamour dust for the heart, fussy cut out then layered on top of my book made using some vellum onto which I added a script stamp using grey ink so it would look soft, the gorgeous ribbon and pearl string (list below) are of course from The Ribbon Girl,
The gorgeous flowers and leaf charm are from there too,
I also used a Tim holtz pen nib and a feather die by Noor, the beautiful papers are of course by Maja Design as is the clock,
At the bottom the beautiful lace and crystal butterfly plus the lace on the edge is again from TRG,


I also used a label type die to make it look a little more book like at the top, as you can see the papers are machine stitched and distressed too,
This is the spine of my book card where I have added some more of the  gorgeous papers and added a little stenciling with some grunge paste and a crafters workshop stencil,

This is the first page inside with yet more of the gorgeous lace, key and hemp twine from TRG, the Cherish word is by Dusty attic and has been given the gesso treatment, I also added a little stenciling on here too, it says  Together in Beauty at the bottom and behind the  removable tags is some more stenciling using a mini confetti stencil,

This is the right hand side and I've made the book style and inside added some Lily of the valley stamps to be romance letters from her love, on the outside is some more of the beautiful lace that compliments the outside  front edge,
peeking out of the edge of the picture is some fabulous ribbon I used to tie it together,


Natural Hemp twine
Rose buds large - pale pink
Champagne silky crush ribbon
Rose bud semi open - pale pink
Clementine ivory embroidered Tulle lace
Fiona White lace
Crystal butterfly with silver wire
Leaf charm - Bronze brass colour
Cream Berisford satin ribbon
Bronze colour vintage style small key
Ivory pearl bead string

Challenges
Simon says stamp - Anything goes
Midweek Magnolias - Valentine / Romance / Love
 7 kids - Anything goes
Totally Tilda - Valentines